Crash report files are ZIP archives sent by a client application to CrashFix server. Crash reports contain various information intended to help to reproduce the crash and eliminate its reason. For example, a crash report may contain crash minidump file, crash description XML file, desktop screen shot file(s), application log files and other.
To browse crash reports, you need to log in under a user having permission to browse crash reports, and the user should be a member of the specified project. After you have logged in, click the Crash Reports button on the Main menu. Crash Reports page appears (shown in the figure below).

Crash Reports
The
Crash Reports page displays crash report files received for the currently selected version of the current project. You may also display crash reports for all versions of the current project. To do this, select '(all)' from
Version drop-down list.
The Crash Reports page contains the search field allowing to filter crash report by IP address, E-mail or by problem description entered by a end user who sent the report. You may also use advanced search, which provides more search options.
Below the search field, there is the actions toolbar, where you may choose an action to perform. For example, you may upload a new crash report files manually. Or you may select several (or all) crash reports and press the Delete Selected button to permanently delete selected items. To perform these actions, your user account needs to have a permission to manage crash reports.
At the bottom of the page, you can see some information on total disc space occupied by the crash reports and percent of disk quota.
To see certain crash report details, click its ID. The
View Report NN page appears, where NN is the crash report ID number. The details page is shown below.

Crash Report Details
The crash report details page is organized into several tabs: Summary, Custom Props, Screenshots, Threads, Modules and Files. Below, these tabs are briefly described.
summary_tab Summary Tab
At the top of the Summary tab (shown in the figure above), there is actions toolbar. Using this toolbar, one may open a new bug for this crash report, reset crash report status to Waiting (this will force CrashFix service to process crash report again) or permanently delete the crash report.
The Summary tab contains various information on received crash report, such as:
-
the date crash report was created;
-
the date crash report was received;
-
crash report's status (Waiting, Processing, Ready and so on);
-
file size;
-
project name and version the crash report belongs to;
-
collection crash report belongs to;
-
sender information (geographic location, IP address, E-mail);
-
exception information (module name, symbol name, source file name and line number);
-
machine information (CPU architecture and count);
-
and other.
Custom Props tab contains custom properties defined by the client application. The tab is shown in the figure below. In the figure, you can see a single custom property 'VideoCard' having value of 'nVidia GeForce'.

Custom Properties
Screenshots tab contains desktop screen shots made at the moment of crash (see the figure below). The tab actually contains small thumbnails of the desktop screen shots. To open a screen shot in its natural size, click the thumbnail.

Screenshots
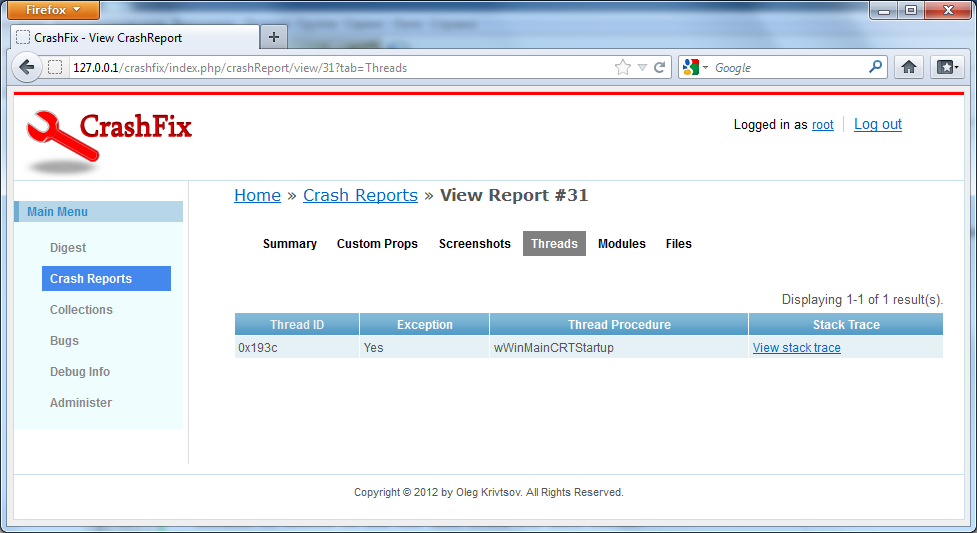
Threads tab contains the list of threads existing in the client application at the moment of crash (see the figure below).

Threads Tab
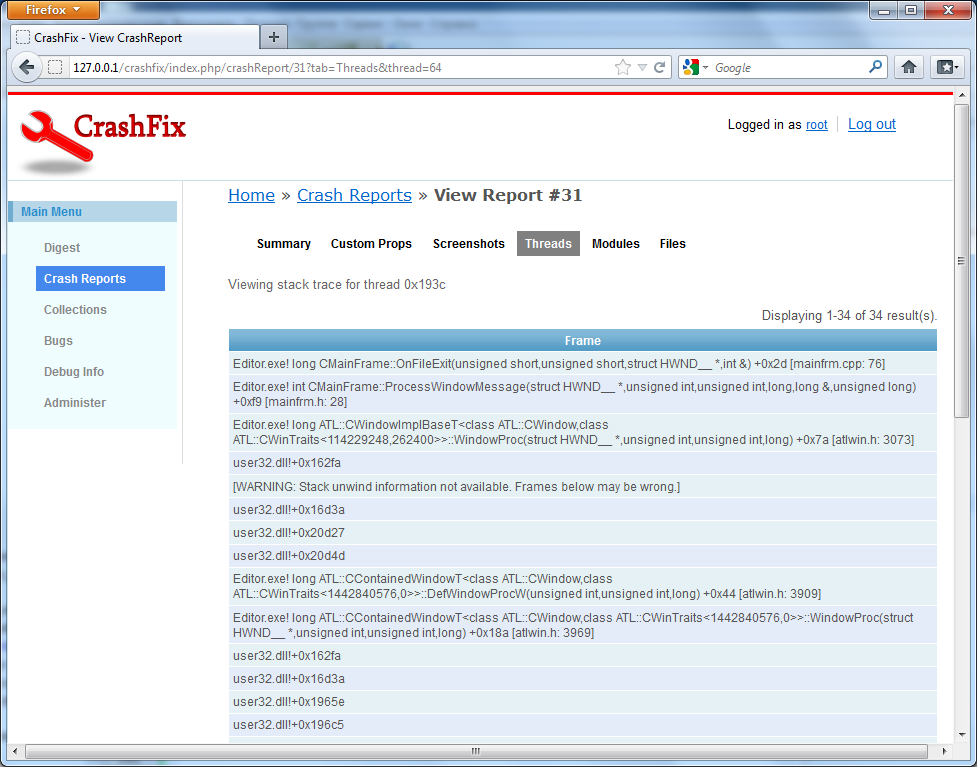
Threads tab is one of the most informative, because it allows to see the call stack for each thread. To see the call stack, click the
View Stack Trace link. For example, the figure below contains call stack for thread 0x193c.

Thread Stack
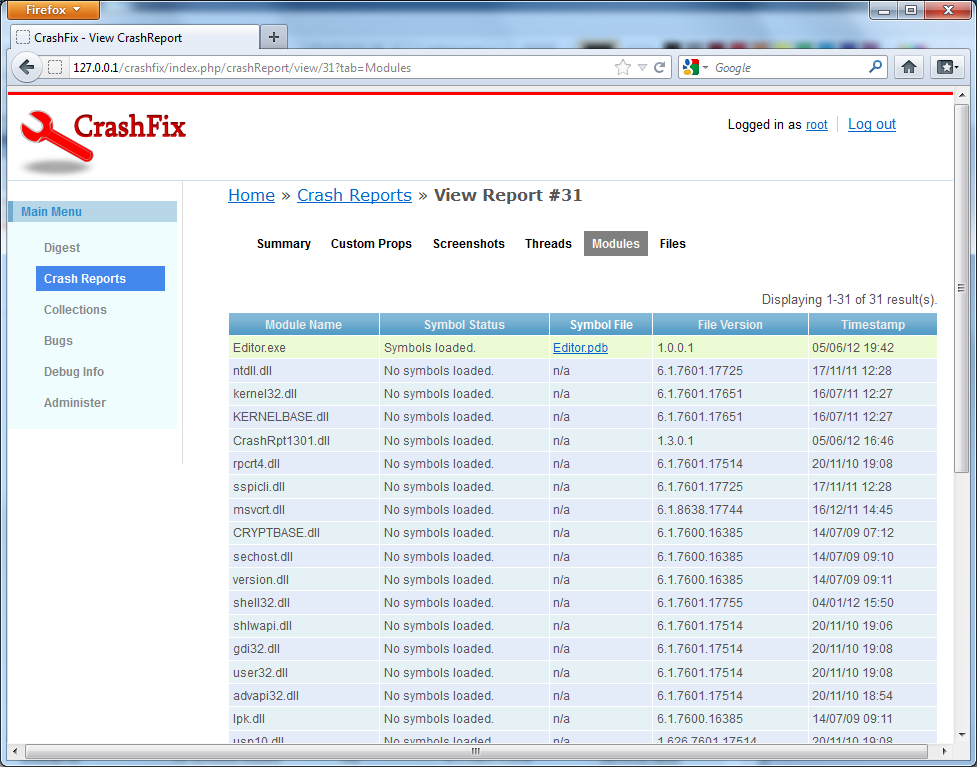
Modules tab contains the list of modules loaded into the client application at the moment of crash (see the figure below). Along with module name, file version and timestamp is listed. If matching symbol file was found for certain module, its name displayed as a link. Clicking the link opens symbol file details.

Modules Tab
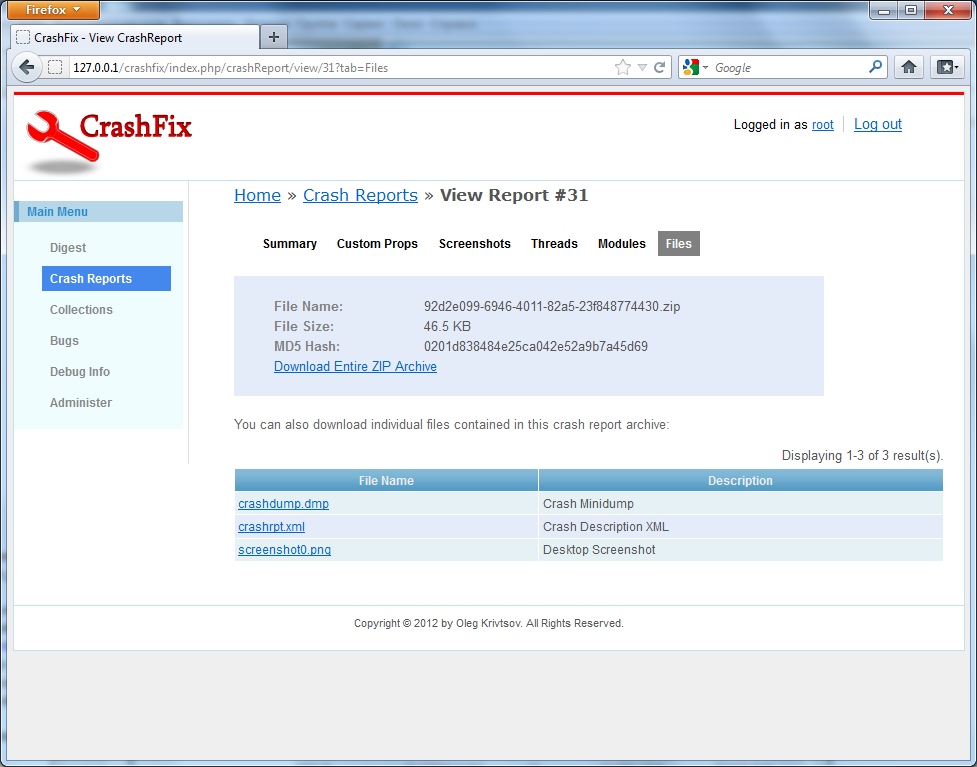
Files tab contains the list of files contained in the crash report archive (see the figure below). For each file item, its name and description is listed. To download a file, click its name. It is also possible to download the whole ZIP archive.

Files Tab
Further reading:
Collections.


 1.5.9
1.5.9