There are a couple of most popular Apache + MySQL + PHP distributions:
Choose one and install it on your Windows server machine.
To check that Apache and PHP are installed and running, create phpinfo.php file in Apache document root directory.
In the phpinfo.php file, enter the PHP method phpinfo() as follows:
<?php
     phpinfo();
?>
Open the file in your browser. The standard PHP information page should display.

PHP Info
CREATE SCHEMA crashfix;
The command above creates empty schema that we will populate later. If the command is executed successfully, the following message is displayed:
Query OK, 1 rows affected (0.05 sec)
Next, we want to create a database user named crashfix that will be used by CrashFix web application for connecting to database. To create the user, type the following (in the command below, replace the <your_password> placeholder with some password):
GRANT ALL PRIVILEGES ON crashfix.* TO 'crashfix'@'localhost' IDENTIFIED BY '<your_password>';
The command above creates the user named 'crashfix' and grants the user all privileges on 'crashfix' database schema.
At this point, you should have Apache HTTP server + PHP + database (MySQL) installed.
Now, download the CrashFix web application zip archive from our Download page. Then unpack the archive to web server's document root directory.
Note: Below, we denote the document root directory as DOCUMENT_ROOT, and you should replace this placeholder with the actual directory path.
If everything is OK, you should have CrashFix files in DOCUMENT_ROOT/crashfix directory:
DOCUMENT_ROOT/crashfix
    index.php       | CrashFix web application entry script
    assets/         | The directory where temporary resources (like images and CSS files) will be published
    protected/      | This directory content is protected from direct access by .htaccess file
        ...
        config/     | This directory contains configuration files
        data/       | This directory will contain crash reports and debug info files
        ...
        runtime/    | This directory will contain logs and temporary files
Edit the DOCUMENT_ROOT/crashfix/protected/config/user_params.ini config file and specify the correct database connection string, login and password. For additional information on config file fields and their meaning, please refer to comment lines that can be found in the config file.
Now, you can try to open the CrashFix web application in your web browser. To do this, type 'http://localhost/crashfix/index.php' in your browser's navigation bar and press Enter. Typically, you should see the following in your browser (see the image below).
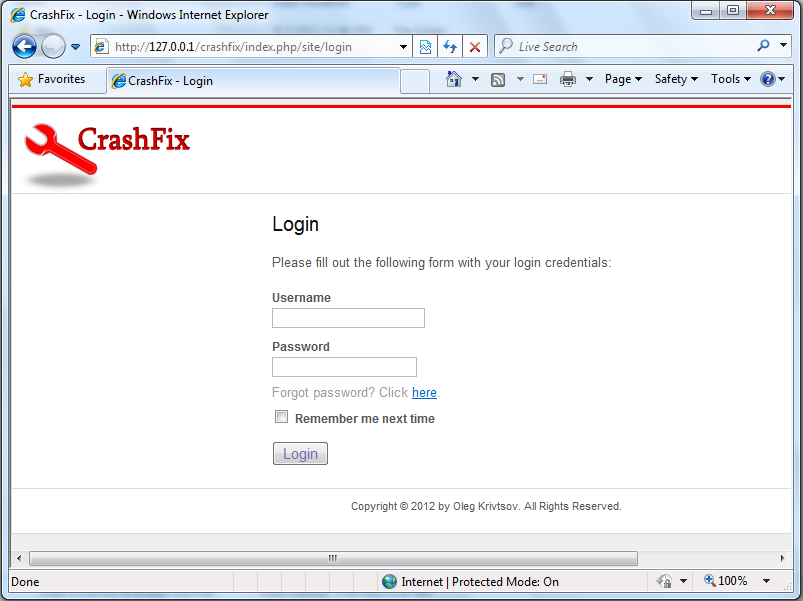
Web Application Login Page
date.timezone = UTC
Do not forget to restart your Apache webserver after editing the config file.
php DOCUMENT_ROOT/crashfix/protected/yiic.php migrate
When prompted, press 'y' and then press 'Enter'. If everything is OK, the following message appears:
Migrated up successfully.
Congratulations! Your CrashFix web application is now installed!
First of all, download CrashFix service installer (EXE) from our Download page.
When the installer has been downloaded, run it and follow wizard's instructions.
If everything is OK, you should have the following directories and files:
C:\Program Files (x86)\CrashFix\
    bin\crashfixd.exe         | The CrashFix service executable file
    conf\crashfixd.conf       | The CrashFix service configuration file
    logs                      | The directory where CrashFix service places its log files
Download the CrashFix uploader tool ZIP archive from our Download page. Then unpack the archive to a directory of your choice.
You should have the following executable files in the directory:
To get help on available uploader commands, type the following:
uploader.exe --help
Note: By default, PHP doesn't allow to upload large files (larger than 2MB). In order to upload large symbol files, you may need to edit your php.ini configuration file and modify the post_max_size and upload_max_filesize parameters. Setting these with 100MB would typically be sufficient (if you plan to upload very large PDB files up to 1 GB in size, than better set these with 1024MB). Do not forget to restart your Apache webserver after editing the config file.
 1.5.9
1.5.9